Table of Contents
- Before your Meeting
- Join your Meeting
- Grid View to See Participants
- Share Content
- Snap to Whiteboard
- Recording the Meeting
- Locking the Meeting
- What do I do IF…
Before your Meeting
- Scheduling your Meeting
- Be sure to invite the room to your meeting for easier Join experience.
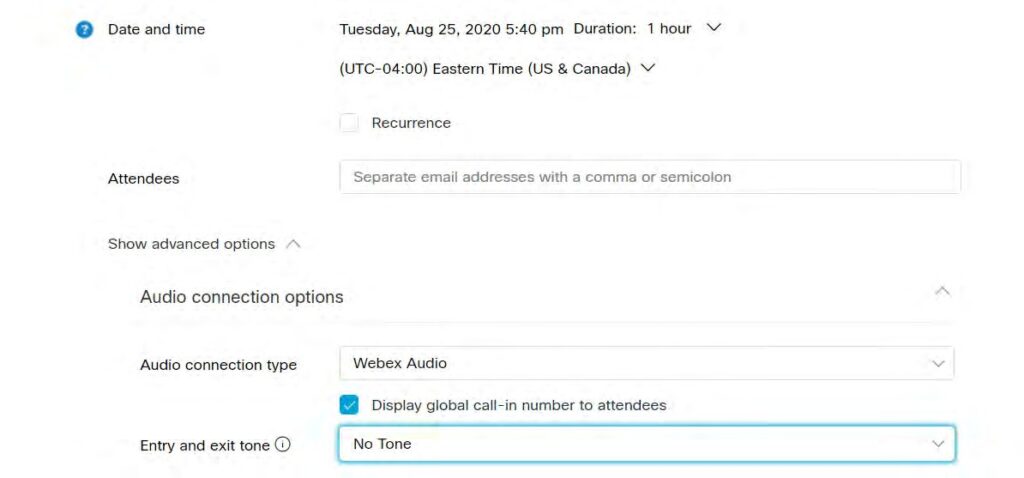
- When scheduling your meeting it is recommended you enable the following:
- Turn off entry and exit tone
- Decide if you want to disable chat
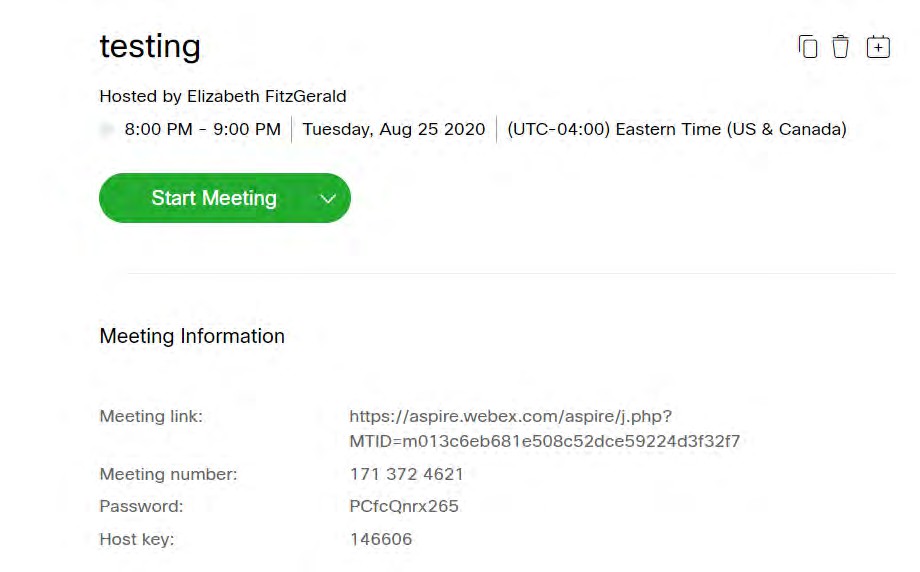
- Meeting # and Host Key
- To find the meeting number and host key, login to the unioncc.webex.com. Go to your list of meetings and find the meeting. Click on the meeting name. Meeting number and host key are listed.
- You MUST bring this information to the classroom.
- In the Classroom
- If you will be sharing content during your meeting, you must log in to the computer on the desk. (It is suggested for an easier experience to do this anyway)
- It is recommended that you open the content you will be sharing so it is ready
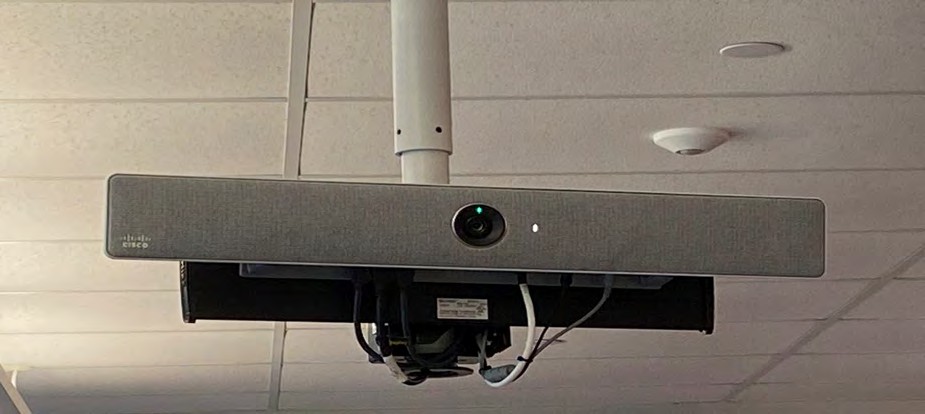
to share. - Be sure to stand within 2 tiles from the whiteboard for the “snap to whiteboard” feature to work.
- Look into the camera mounted on the ceiling. It is looking for facial features.
Join your Meeting
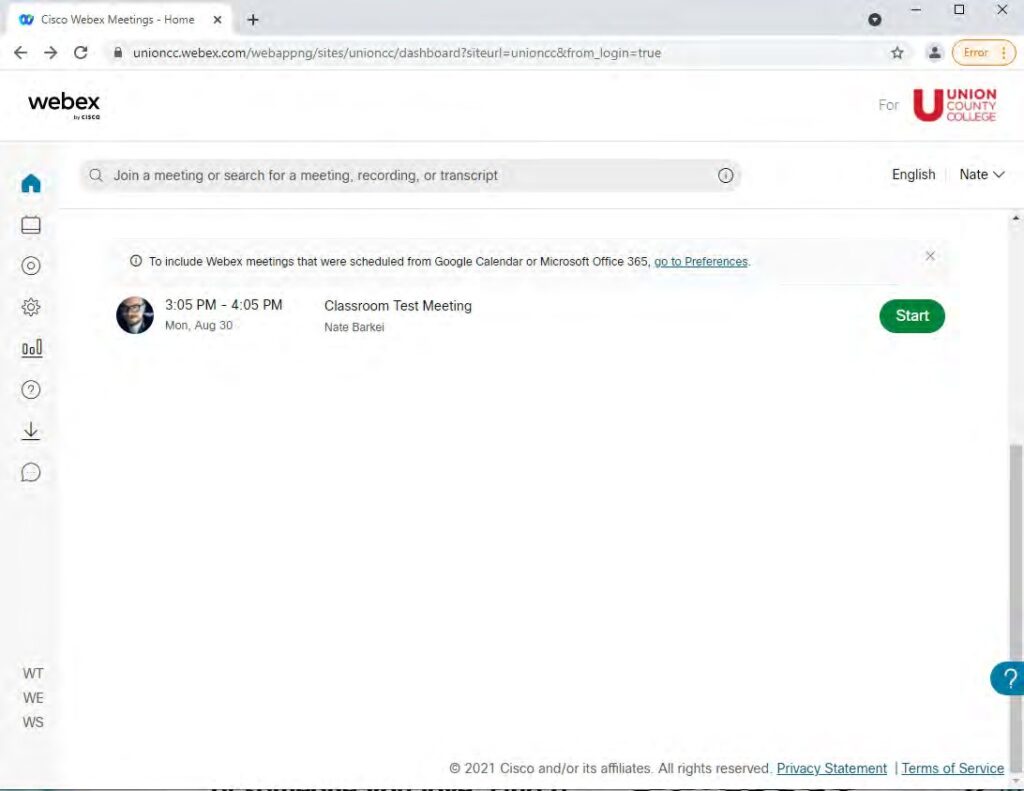
From the Classroom Computer – Option #1
- After logging into the computer in the room open a browser and go to unioncc.webex.com and log in.
- Find your meeting and click “Start”.
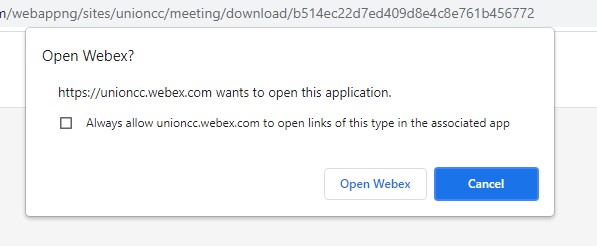
- After you click Start a window will pop up and you will be asked if you want to open Webex.
- Click “Open Webex”
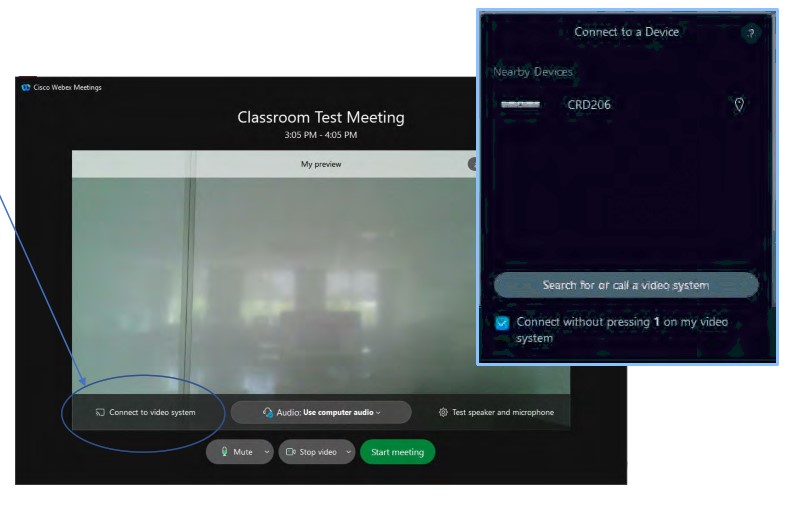
- The Cisco Webex Meetings application will open.
- Click “Connect to video system”
- Then select the name of the room you are currently teaching in (in this example it is CRD206) and click it.
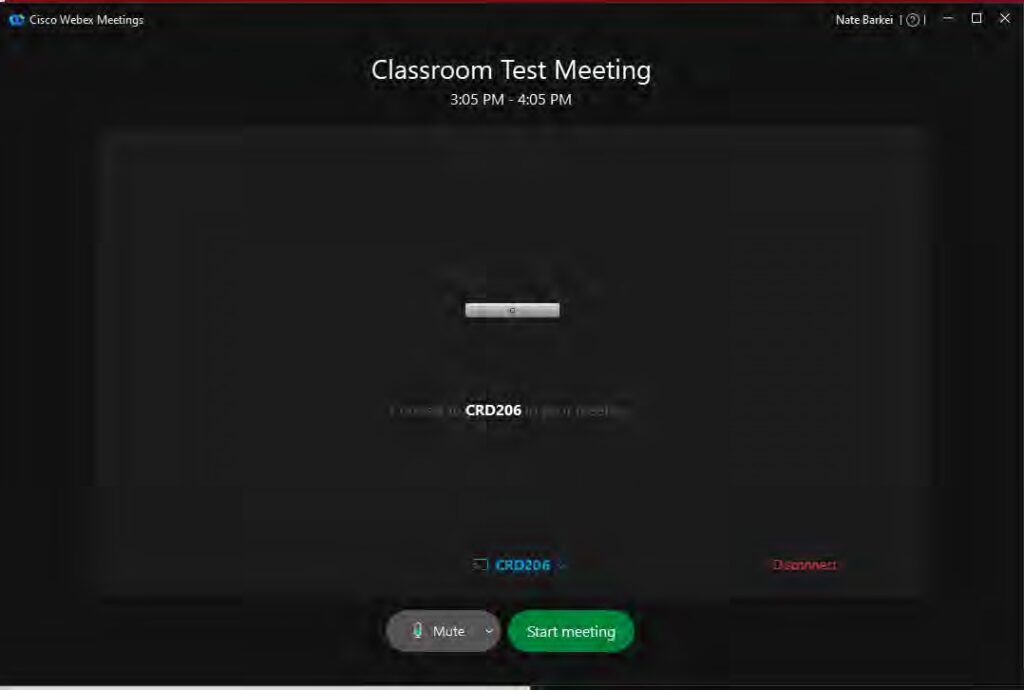
- If everything is ready you should now see the room kit listed in the middle of the screen instead of your own video.
- Click “Start meeting” to begin your class.
From the Classroom Computer – Option #2
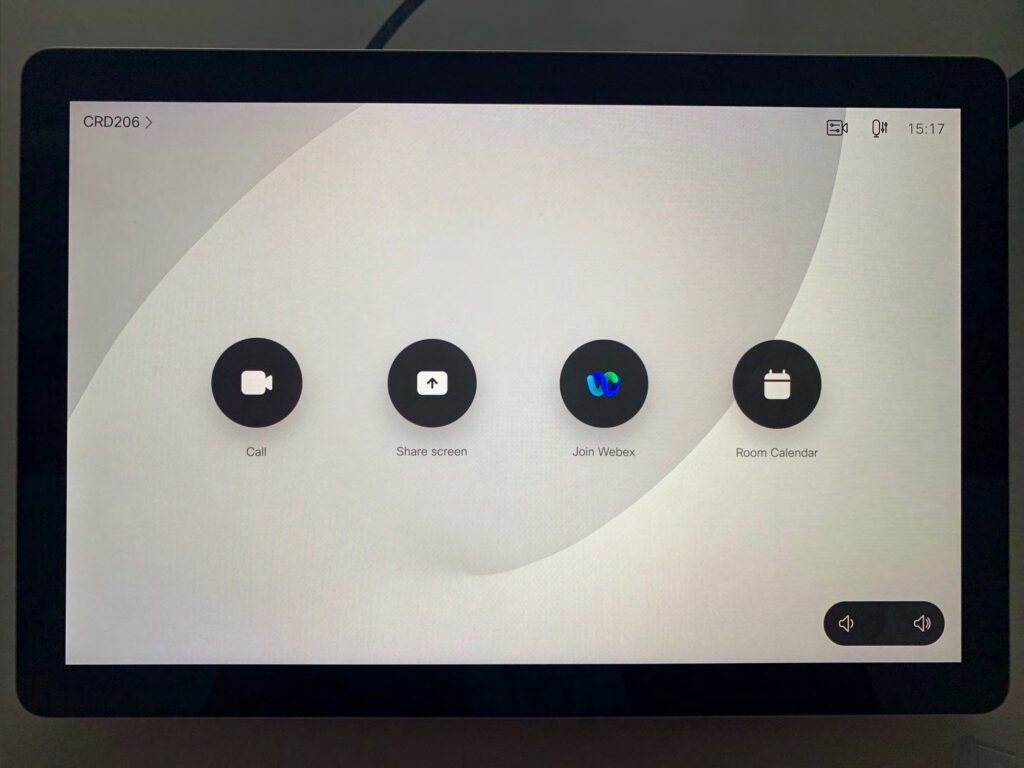
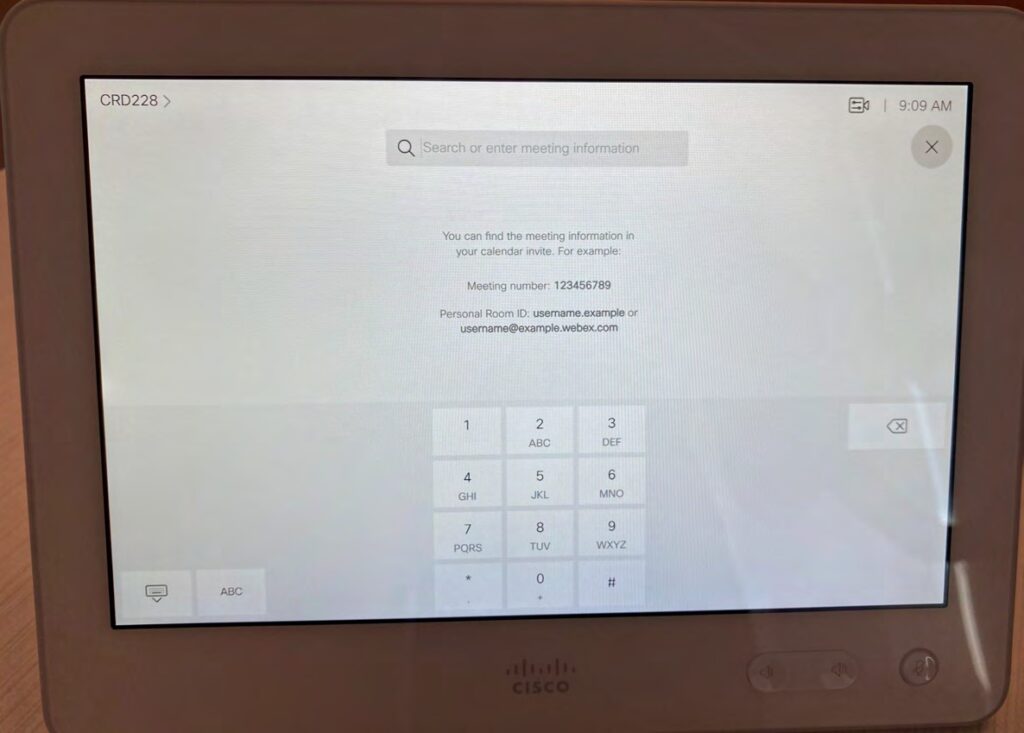
- You can join your meeting by using the Touch 10 pad and clicking “Join Webex”
- You must have your meeting number to join your meeting this way. Enter the meeting number.
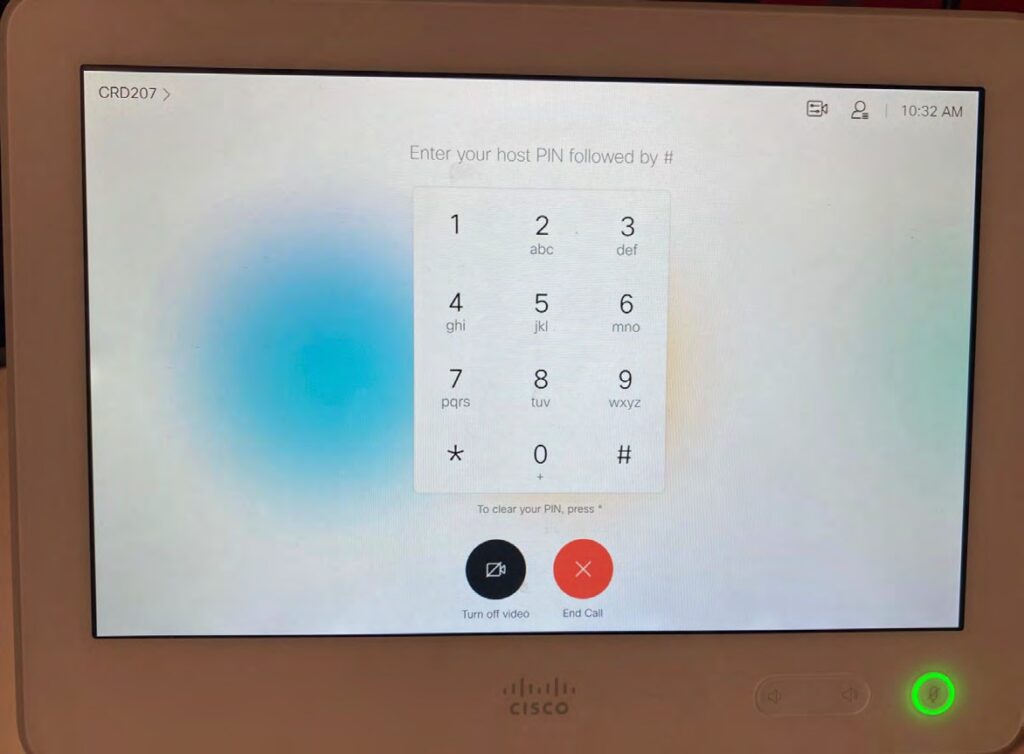
- Enter your host key followed by #.
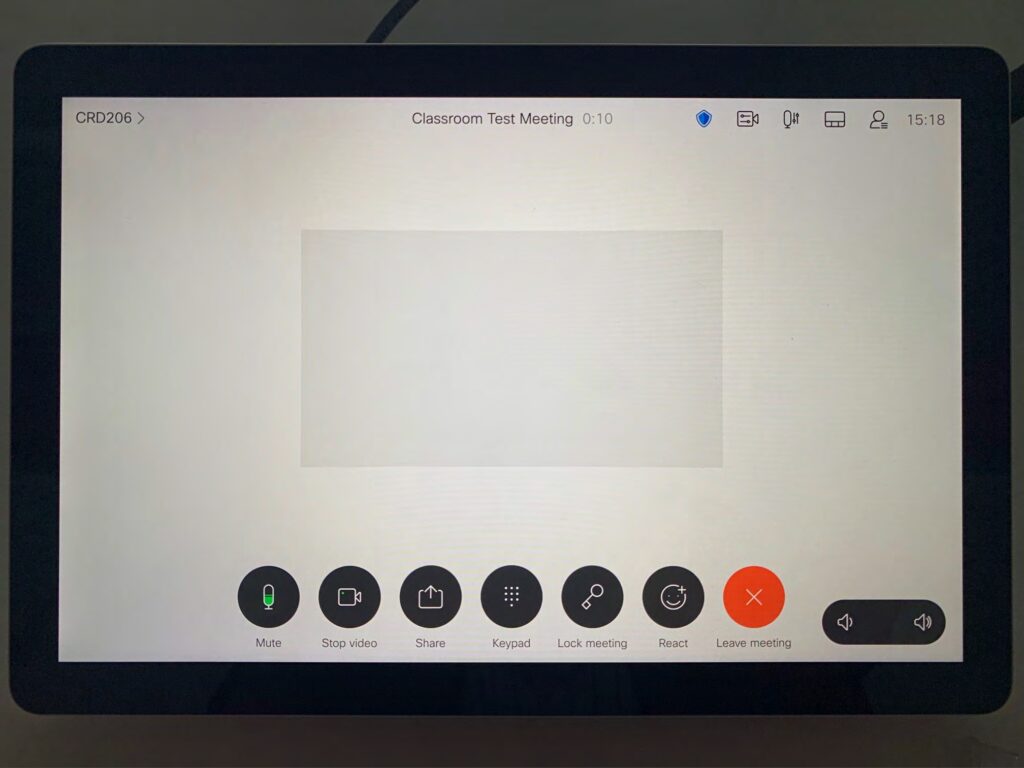
- Do not turn off video.
Grid View to See Participants
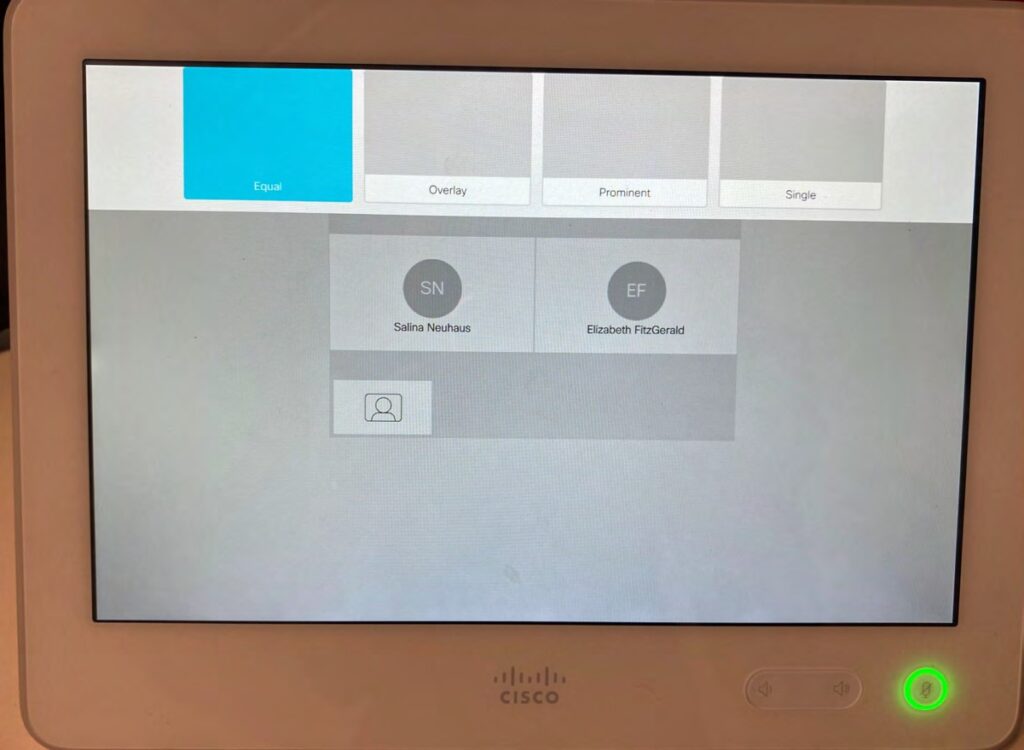
- There will be an additional monitor on the desk where you will be able to see the participants and see what is being shared. In order to change the view of participants to “grid view”, first click on the view icon.
- Choose the first option “Equal” to create grid view to see all participants.
Share Content
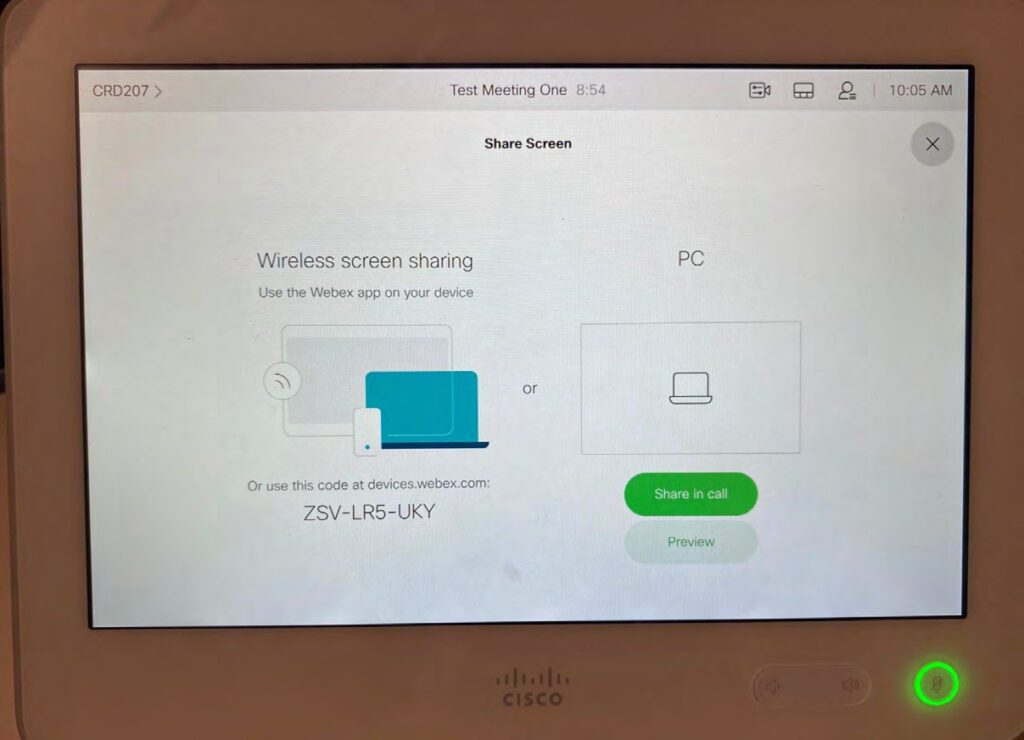
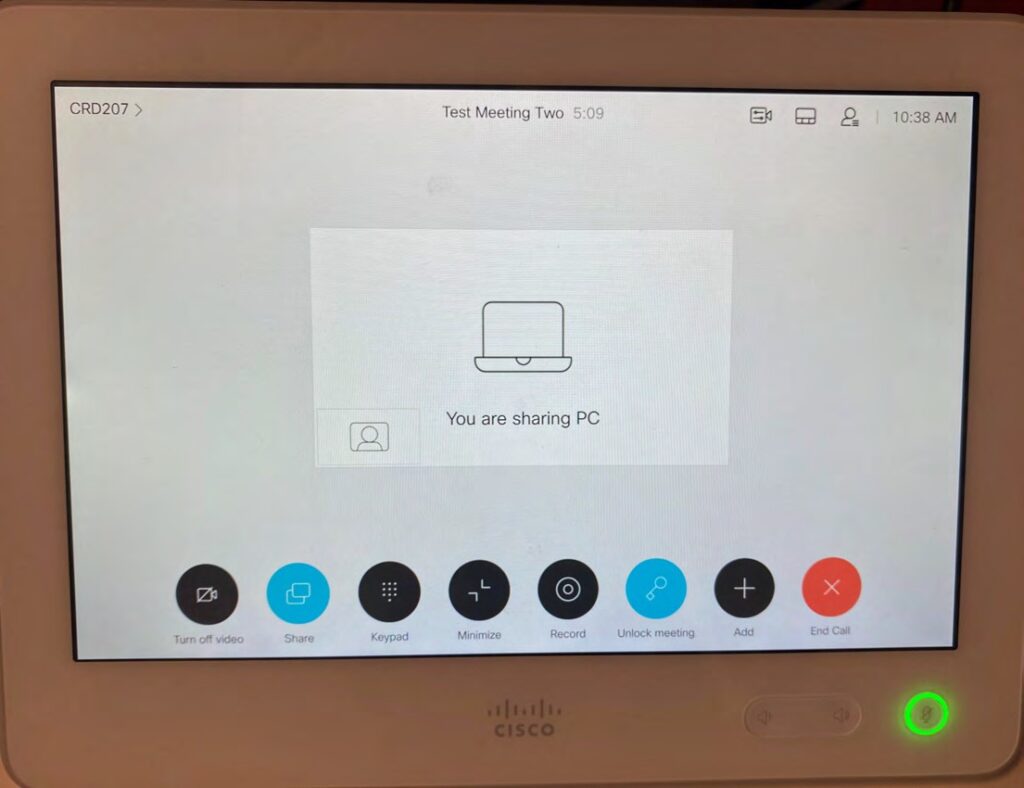
- You must be logged in to the computer on the desk to share content. Click the “Share” button.
- The computer on the desk is connected to the device. Choose “Share in call”. You will be sharing the screen you see on the PC/Wacom in front of you.
- The Touch 10 will show that you are sharing your PC. It will not display what you are sharing. You need to look at the PC/Wacom.
- To stop sharing, click “Stop Sharing”.
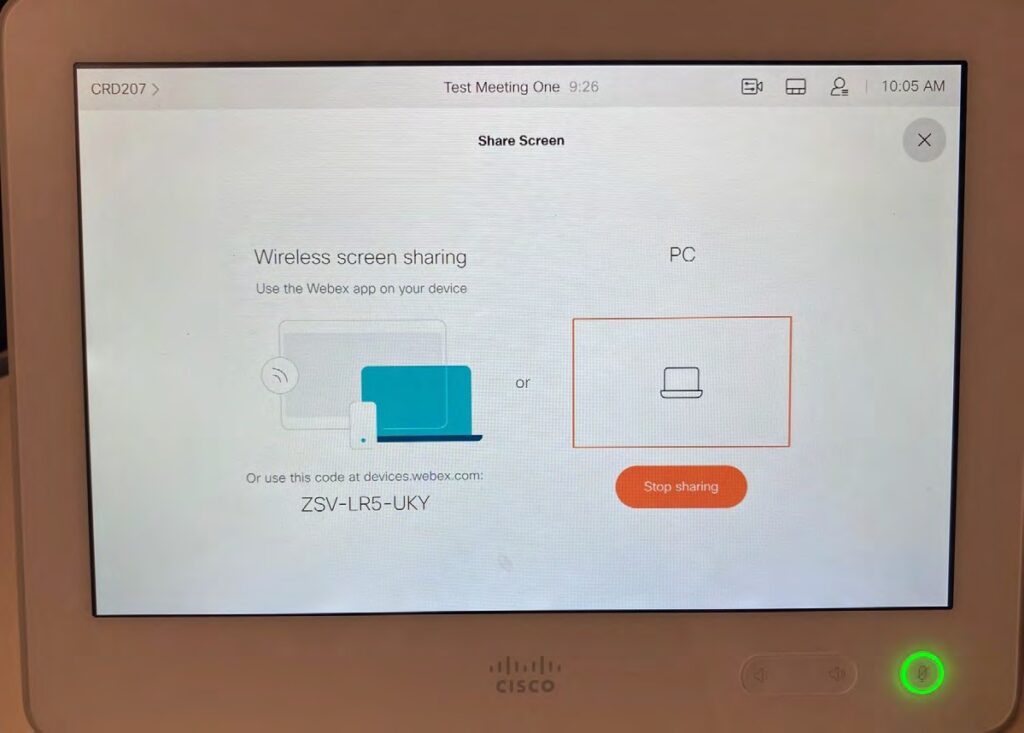
- This is the screen on the Touch 10 you will see when you are successfully sharing.
- If you used Option #1 to connect above, you can also share other content, or applications from the connected PC directly.
Snap to Whiteboard
- The feature “snap to whiteboard” is automatically enabled for you. This feature will position the camera to include not only the speaker but the entire whiteboard behind. However, the camera is sensitive. You must look at the camera so it recognizes a face and you must stand no more than 2 tiles away from the whiteboard wall (pic A) or the camera will move to speaker view and will not include the whiteboard (pic B).
A
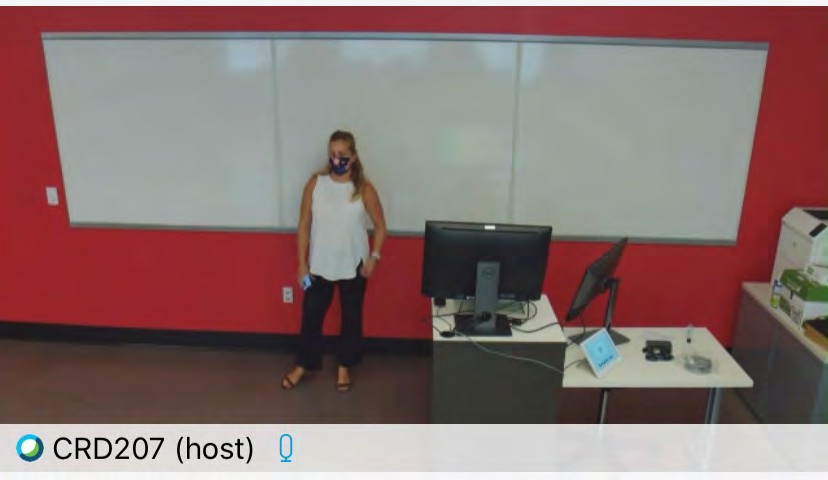
B

Recording the Meeting
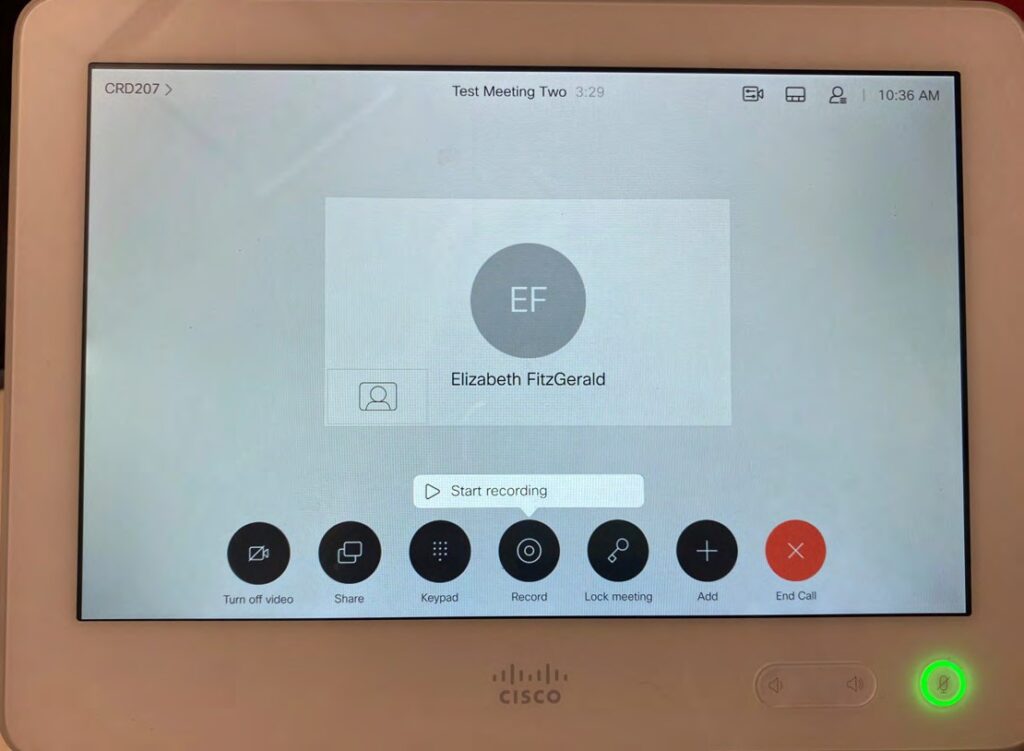
- You can record your meeting from the Touch 10. Simply click the “Record” button. And click “Start recording”.
- It is important to note, you will not see an indicator on the Touch 10 that you are recording.
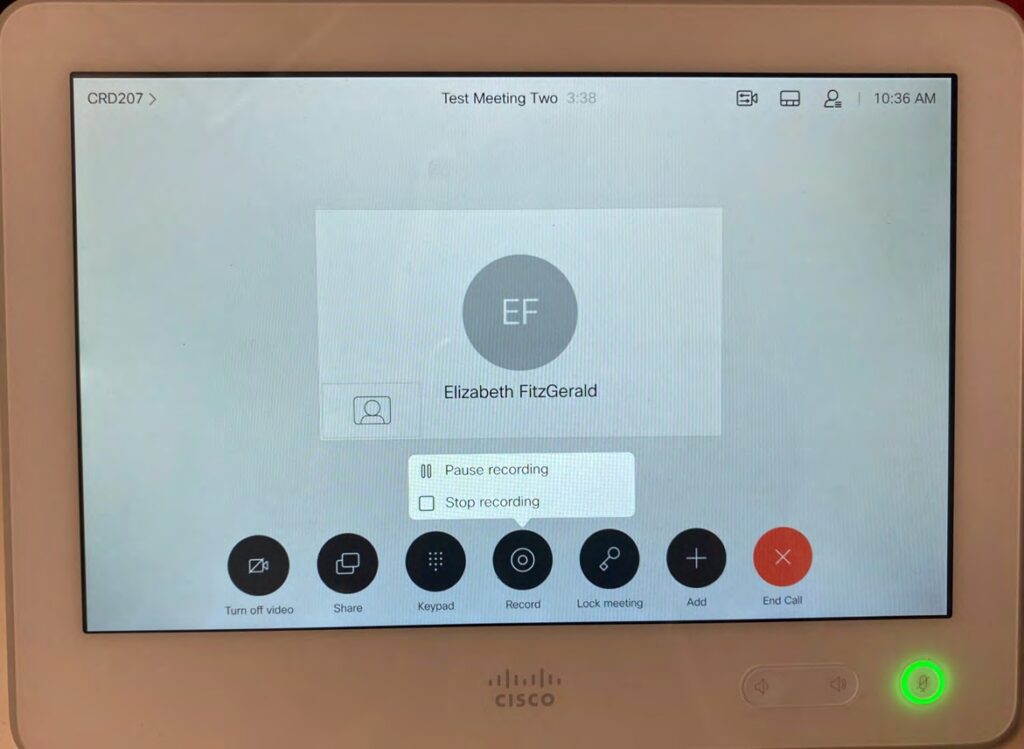
- If you need to Pause or Stop recording or simply want to ensure you are recording, you can click the “Record” button again and you will be able to choose:
- Pause recording
- Stop recording
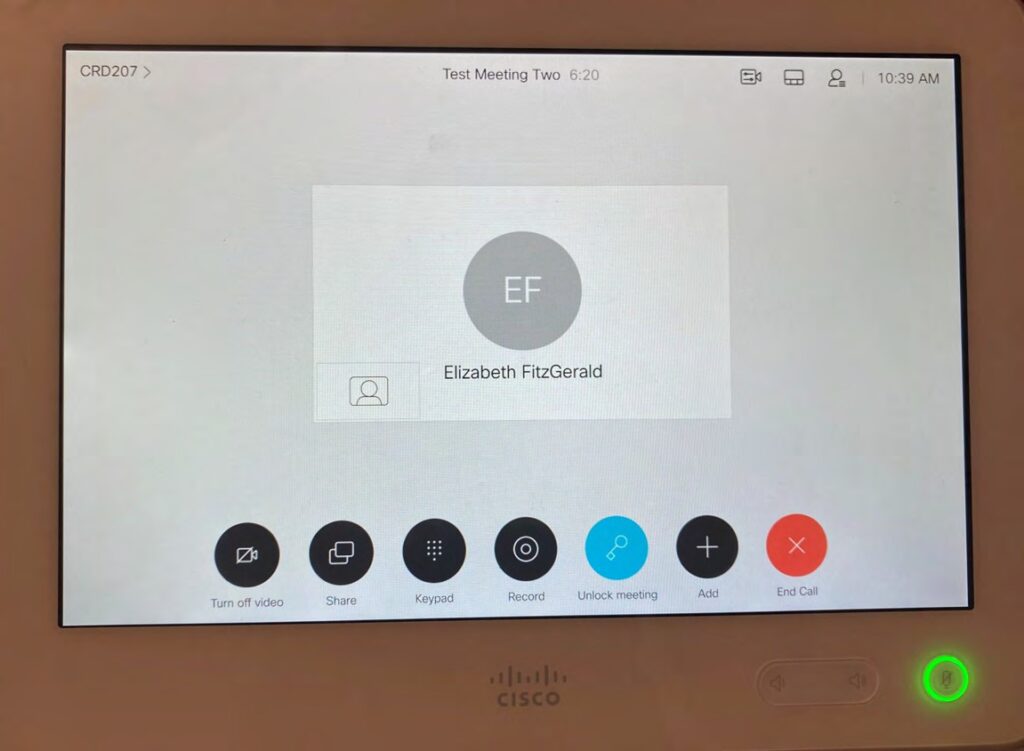
Locking the Meeting
- You have the ability to lock the meeting which will prevent other participants from joining. Simply click the “Lock meeting” button. It will then appear BLUE to show the meeting is locked.
- You can unlock the meeting anytime by clicking the button again.
What do I do IF…
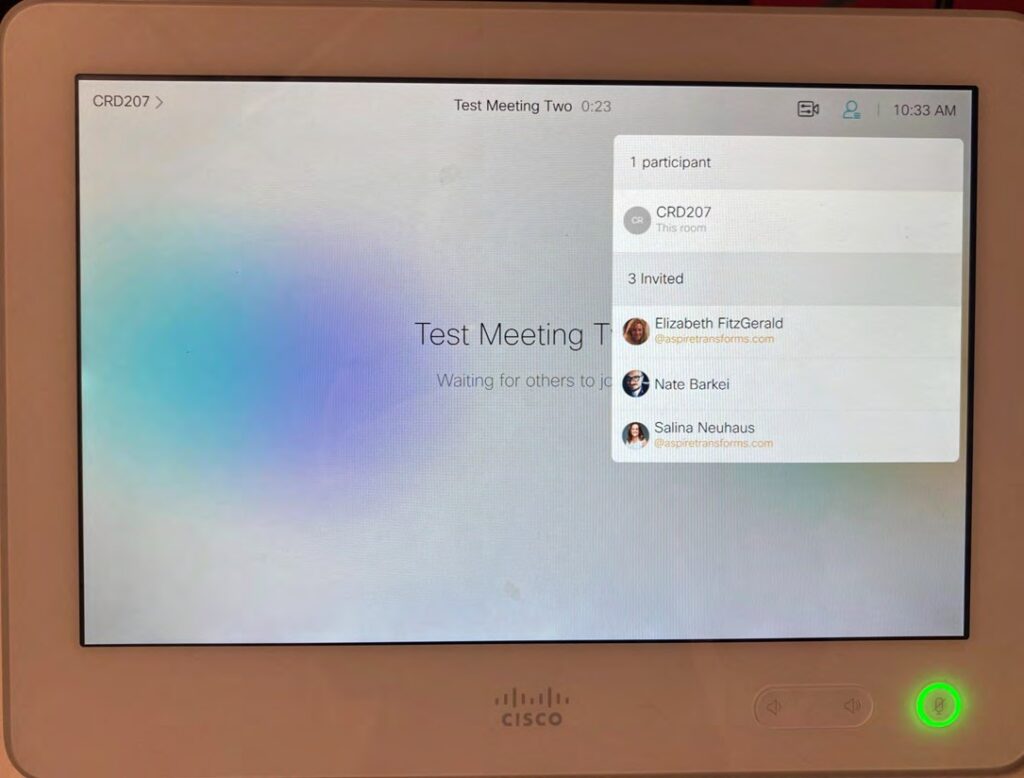
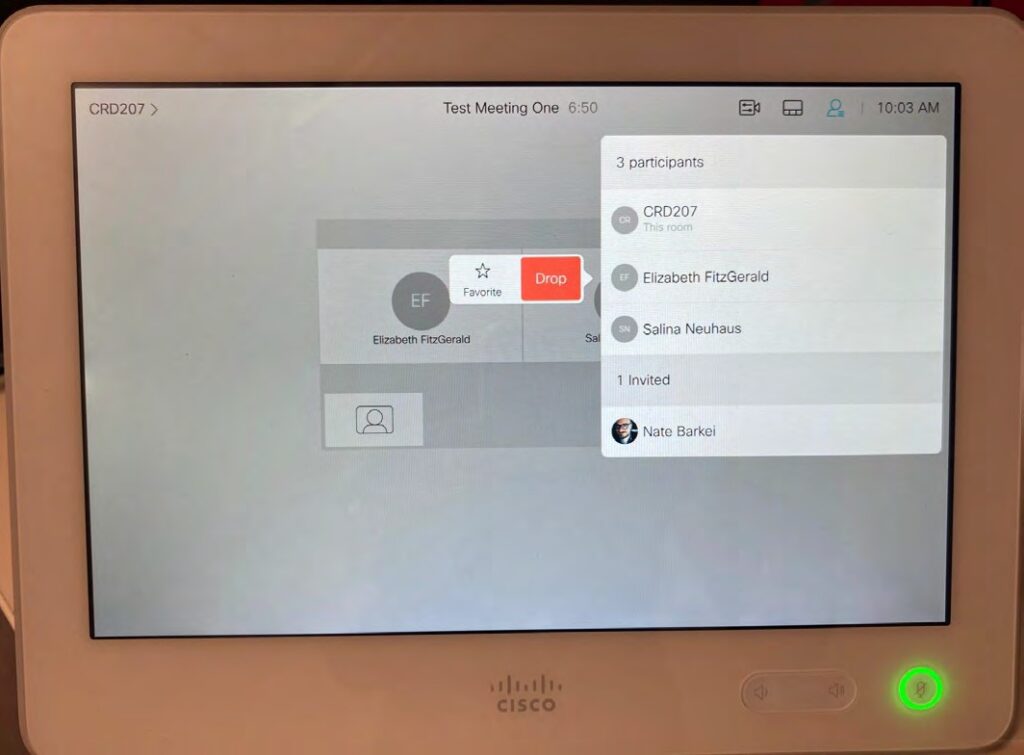
- I want to see the list of participants?
- You are able to see the list of participants that are in the meeting and the list of those that have been invited but have not joined. Simply click on the participant icon to bring up the list.
- I want to mute all or some of the participants?
- From the participant list described above you can mute, unmute, some or all of the participants in the room. You can also set the meeting to mute participants on entry.
- If you do have a participant that is too disruptive to class, you can force them to drop from the meeting.
- To do this, click on the participant icon, then click on the participant name and choose “Drop”.
- Please note, they will be able to rejoin unless you lock the meeting.
- I want to “chat” with the participants?
- Unlike in a meeting that you join from your desktop, you are not able to chat with participants when joining from this device.
- If you used Option #1 above, you can chat with participants in the Webex application on the desktop.