Introduction
The UCNJ Virtual Desktop will allow you to access college software as if you were on campus. Powered by Omnissa Horizon, you will be able to connect to this desktop with your browser or by using the Omnissa Horizon Client; available for all currently supported versions of Windows and Mac, as well as some Linux distributions. If you have any issues, please contact techsupport@ucc.edu.
Connecting with the Omnissa Horizon Desktop Client
Please note that the Virtual Desktop is non-persistent; anything saved to the Desktop will be cleared after logoff.
Download the client
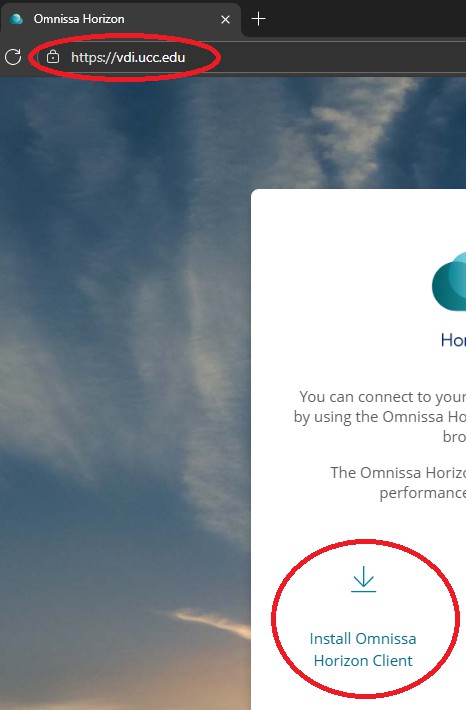
- Navigate to vdi.ucc.edu and click on the Install Omnissa Horizon Client link:
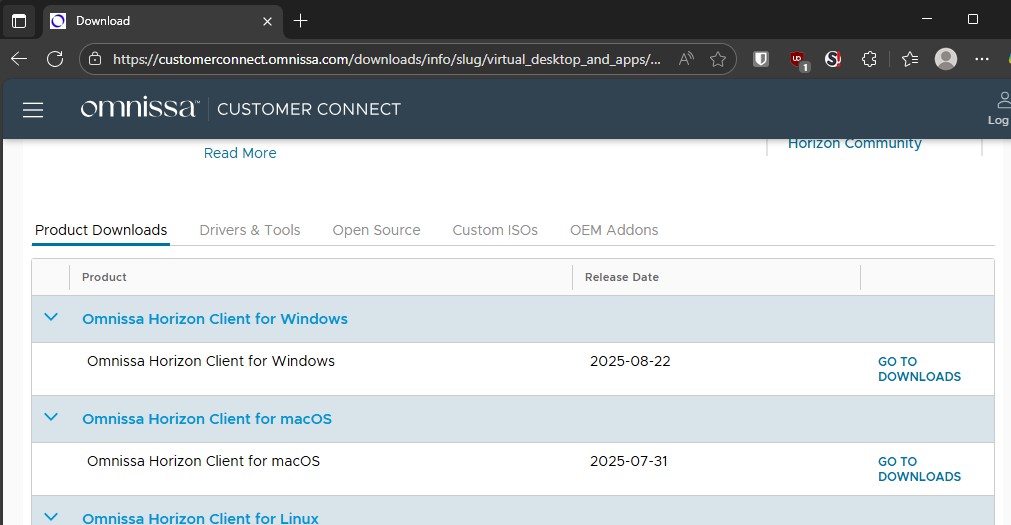
- Choose your VDI client that matches the operating system you are using and download the installer:
Install the Client – Windows
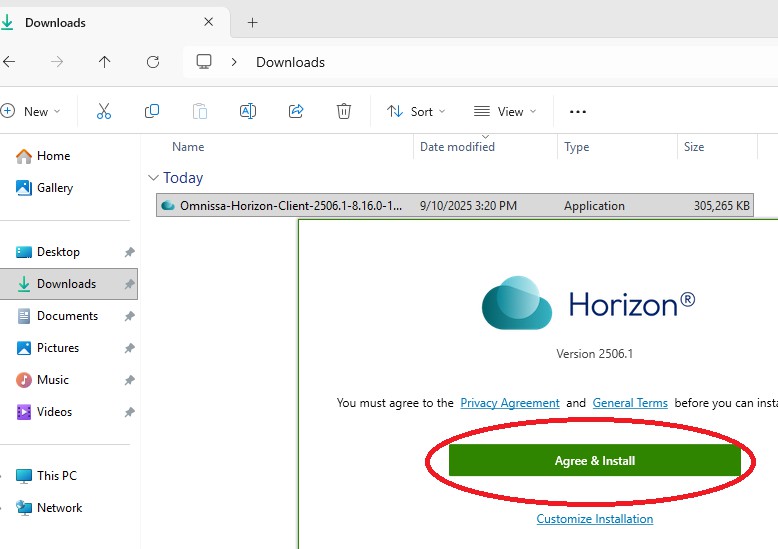
- Double click and run the Omnissa Horizon Client installer, agree and install:
- After the install has completed please reboot your computer.
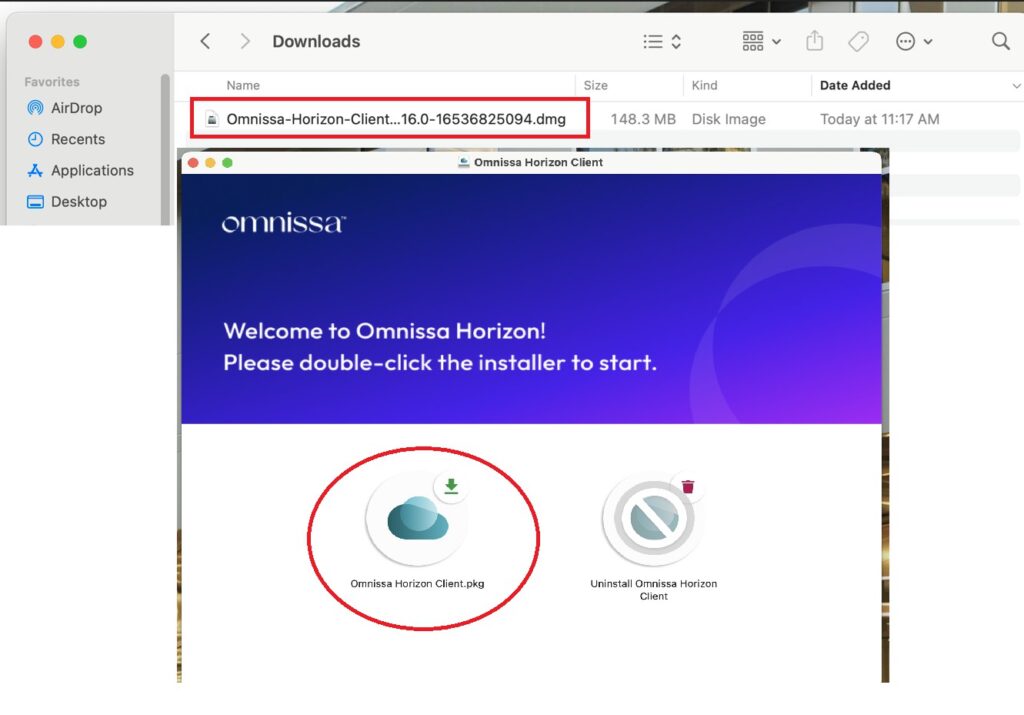
Install the Client – Mac
- Open the downloaded Omnissa dmg file and run the pkg installer:
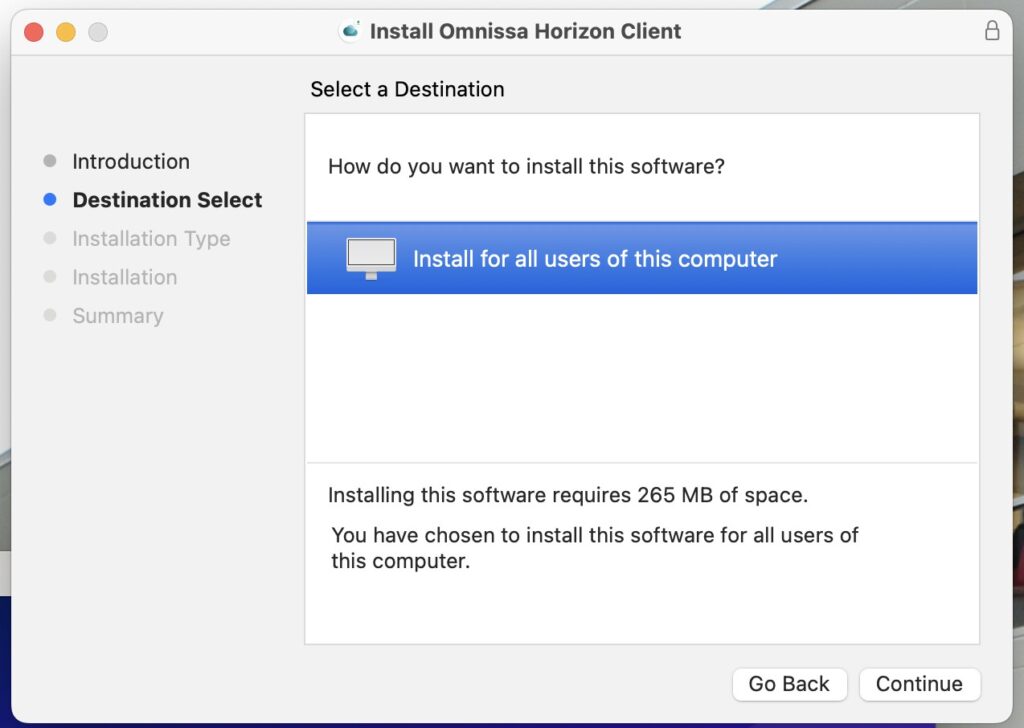
- Continue through the install process until completed:
Using the Client
Adding VDI server / Login Instructions
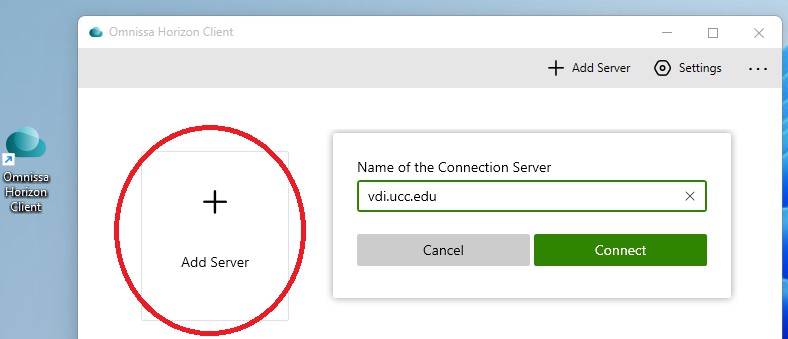
- Open the Omnissa Horizon Client and click Add Server. Enter vdi.ucc.edu for the name of the connection server:
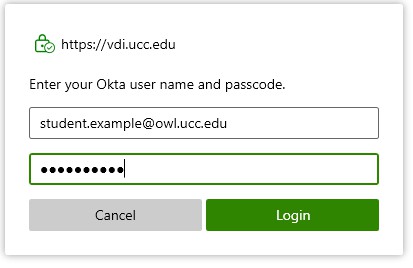
- Login with your UCNJ email address and password:
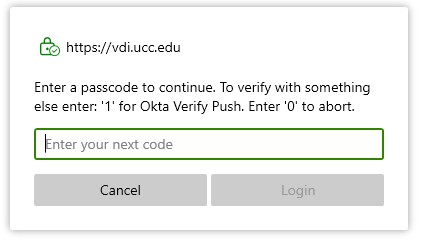
- You will now be prompted for your Multifactor Authentication. VDI will only work with Okta Verify or Google Authenticator. Enter 1 to initiate a push to your device or type in the code displayed in your app:
Folder Sharing Setup
- Sharing a folder to VDI is recommend so you have a place to save documents to your local computer. Any files saved on VDI itself will be deleted after logoff. After connecting to VDI, open Settings > Drive & Folder Sharing and add the folder you want to share:
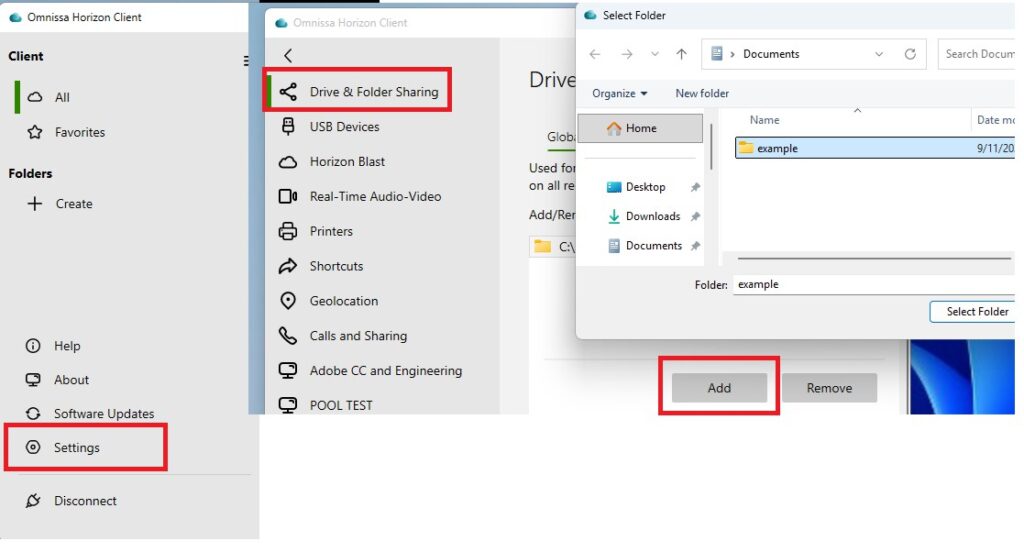
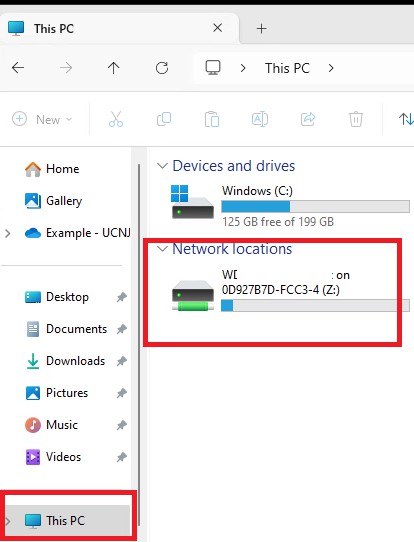
- You can access these shared folders by opening File Explorer and going to This PC. Generally, Shared Folders mount on the Z drive:

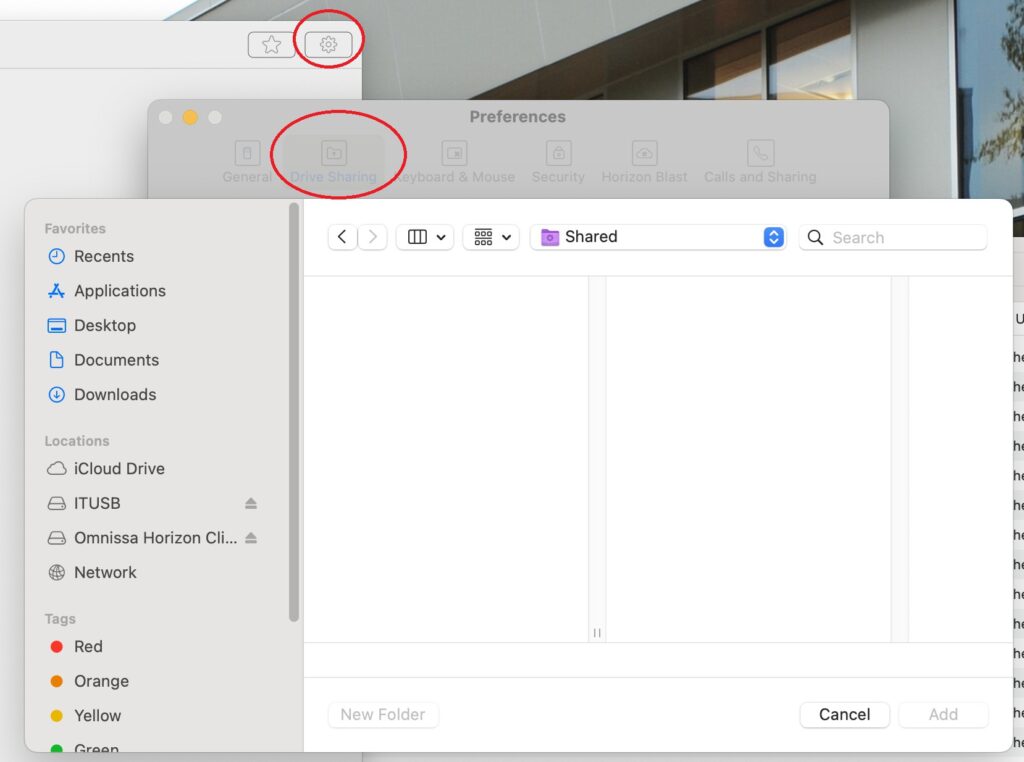
- For Mac, you can setup shared folders from the Preferences dialog:
USB Setup
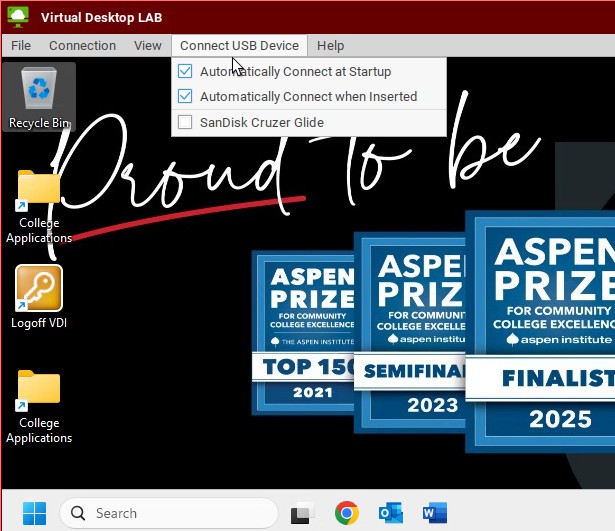
- For Windows, once connected to the desktop, you can mount a USB device from the top menu:
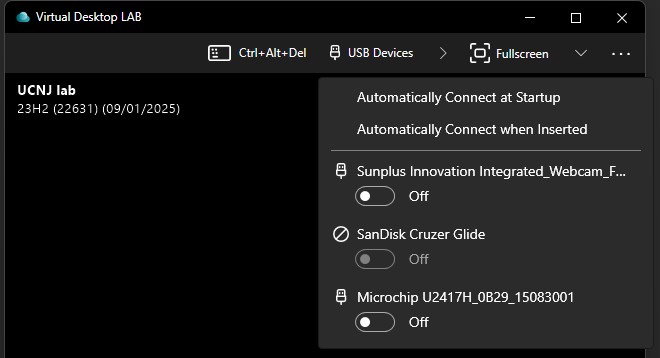
- You can access the device in VDI by opening This PC from the file explorer and going to the Z: drive.
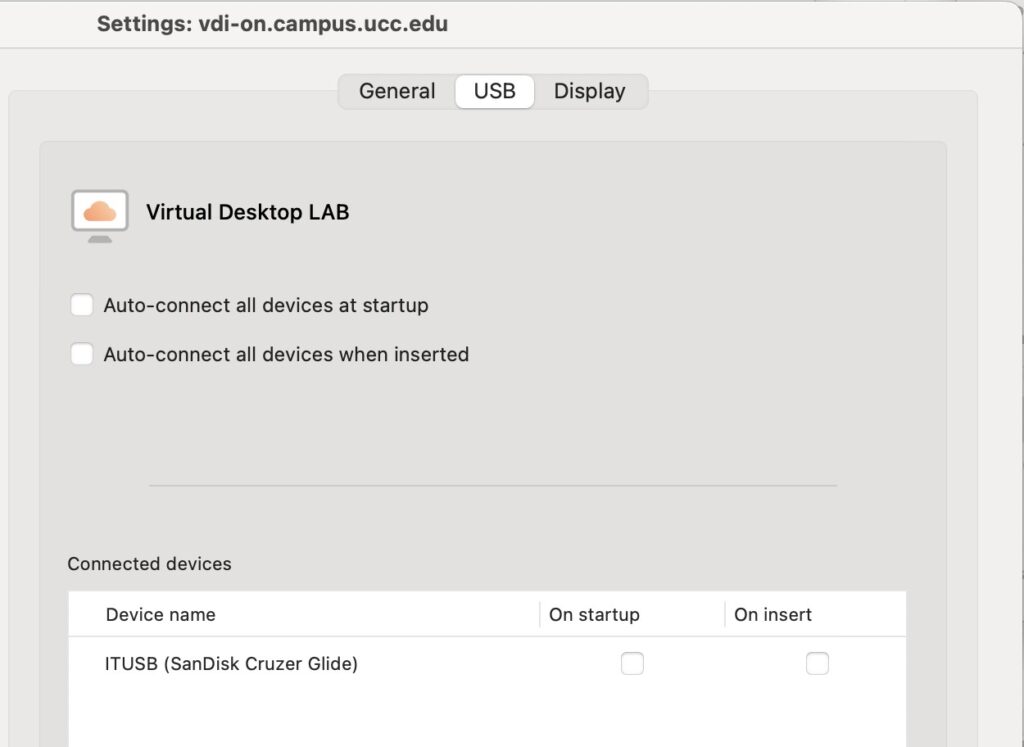
- On Mac you can open the Settings of the desktop and setup the devices you want to connect to:

Connecting to VDI
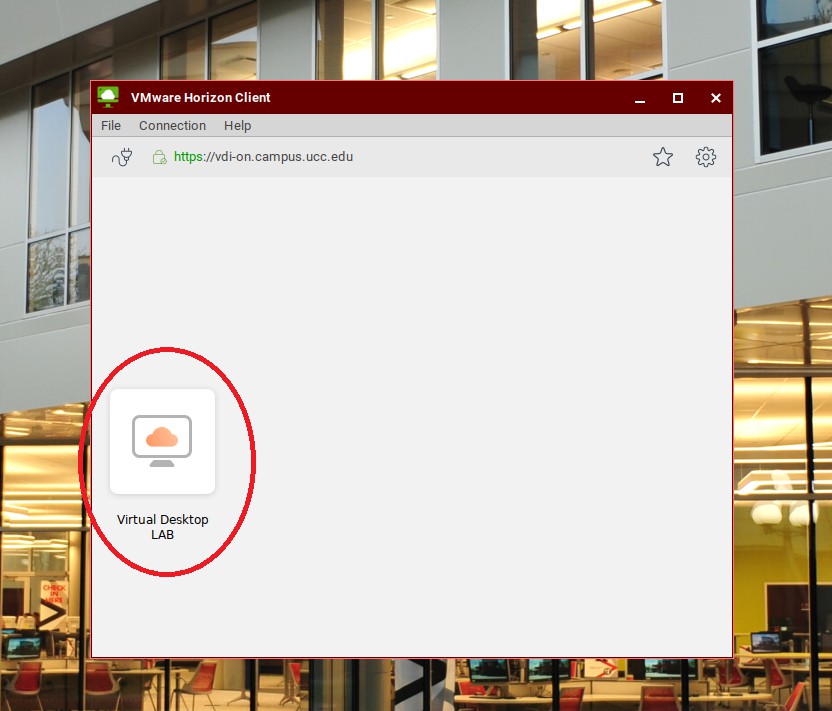
- You can now open the Virtual Desktop Lab. Please go to Navigating Virtual Desktop Lab for further instructions.
Navigating Virtual Desktop Lab
- After connecting to VDI, you can open the desktop by selecting Virtual Desktop Lab. Depending on the courses you are registered for, you may see other desktops, including Adobe CC and Engineering, where Adobe and Autodesk software is available:

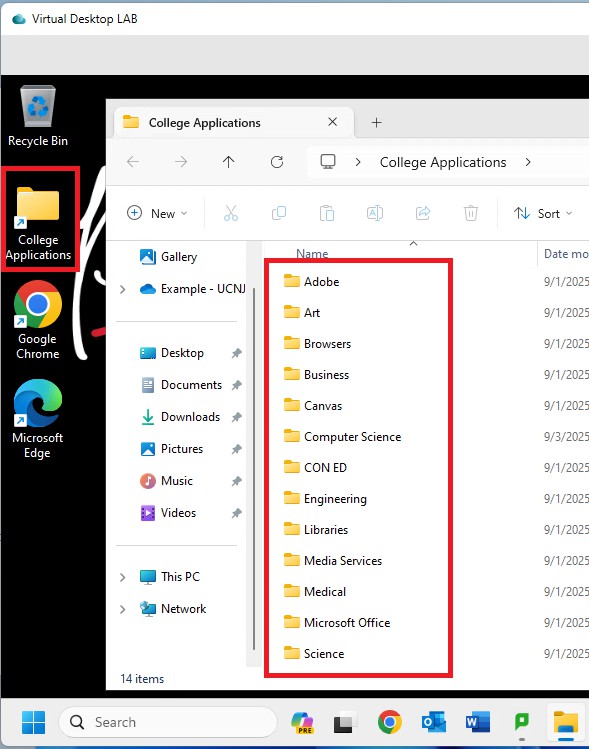
- Once you have connected to the desktop you can access all applications from the College Applications folder:
- You can access network shared folders from your local computer by opening File Explorer and navigating to This PC. Typically shared folders mount on the Z drive:
Using an On Campus Thin Client
- Login to the thin client terminal with your UCNJ username and password. The client will load all available desktops:
- You can connect to a USB device from the top menu: