Here’s how to connect your phone or laptop to the UCNJ Network.
Generally, it’s as simple as:
- Join the “wifi.ucc.edu” network
- Enter your myUnion username and password
- Agree to “trust” the certificate
View Our Illustrated Step by Step Guides
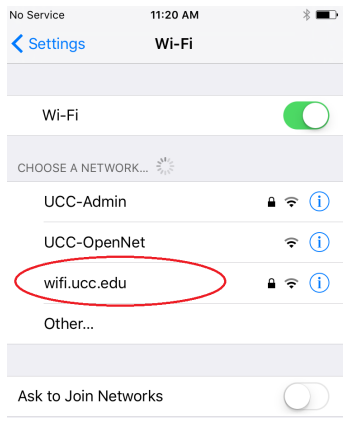
iPhones
Please select “wifi.ucc.edu” from the list of available connections.
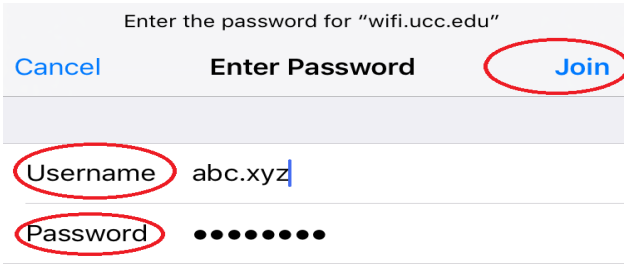
Enter your myUCNJ credentials.
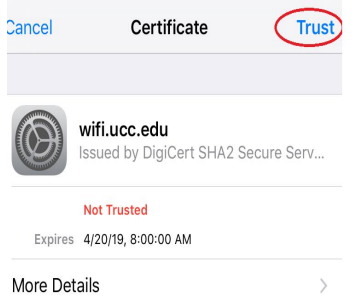
Select Trust/Accept on the Certificate page.
You should now be connected to the “wifi.ucc.edu”
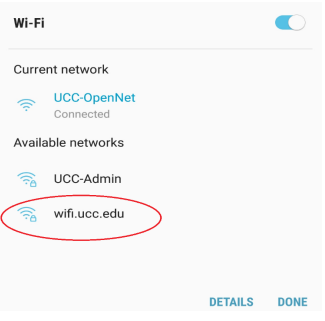
Androids
Please select “wifi.ucc.edu” from the list of available connections.
Once you select “wifi.ucc.edu” it should auto-fill the below fields.
If it doesn’t, please select as per the below screenshots.
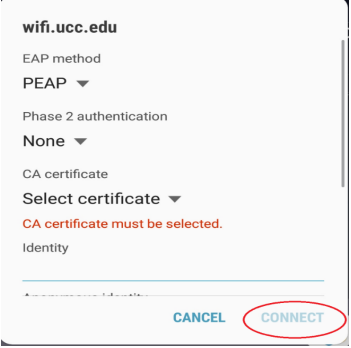
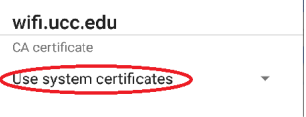
If the “CONNECT” option is greyed out then, click on the drop down option near CA certificate and depending on the OS version on your mobile device, select either “Don’t Validate” or “Use system certificates”

If it prompts for Domain then enter “campus.ucc.edu” else just enter your myUCNJ credentials
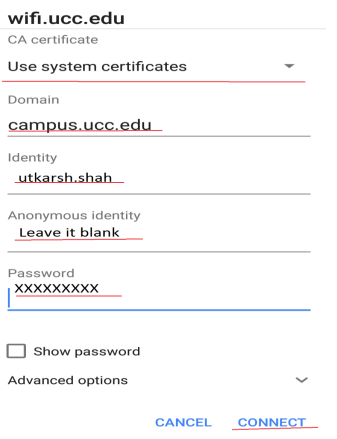
You should now be connected to the “wifi.ucc.edu”
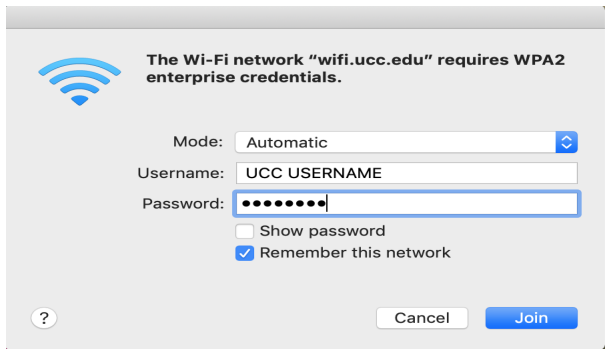
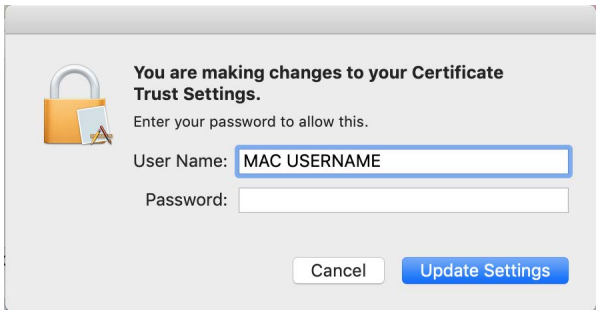
Apple PC’s
Please select “wifi.ucc.edu” from the list of available connections.
Leave the default setting for mode(Automatic) and enter your myUCNJ credentials
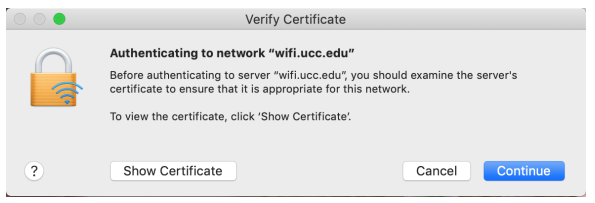
Enter the Mac credentials to add the certificate to your Certificate Trust Settings, click on ‘Update Settings.’
You should now be connected to the “wifi.ucc.edu”
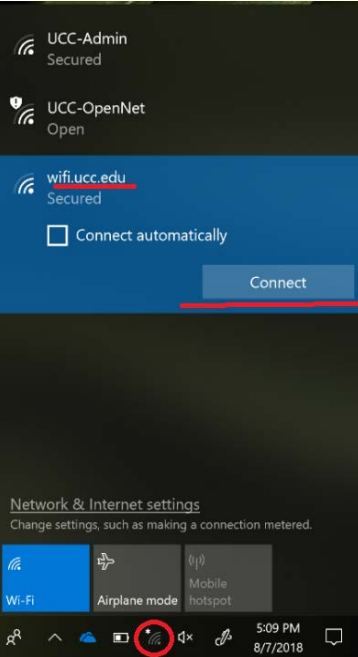
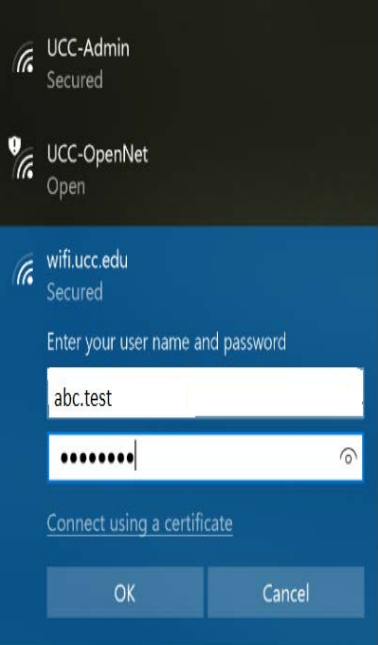
Windows PC’s
Please select “wifi.ucc.edu” from the list of available connections.
Enter your myUCNJ credentials.
Click Connect
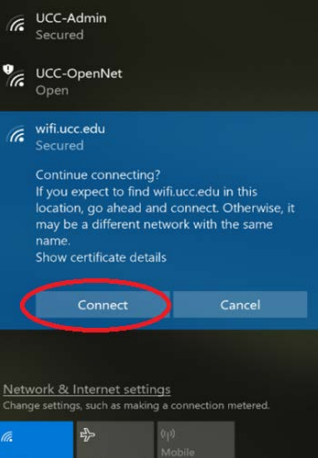
You should now be connected to the “wifi.ucc.edu”
Chromebooks
After choosing ‘wifi.ucc.edu’ it will prompt you for the proper configuration. Please enter the information in the following fields:
- EAP Method – Select ‘PEAP’
- Phase 2 authentication – Should be set to ‘Automatic’
- Server CA certificate – set to ‘Do not check’
- Identity – Your myUCNJ username address.
- Password: Your myUCNJ password
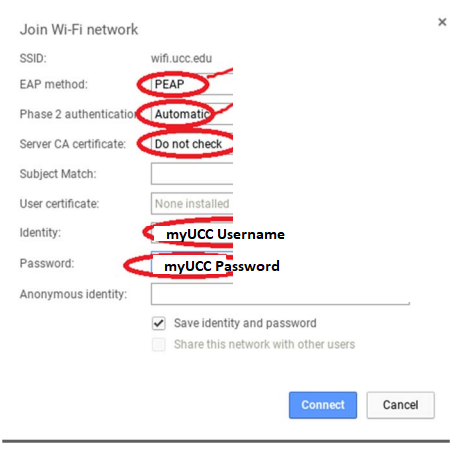
You should now be connected to the “wifi.ucc.edu”